


View the complete article here.
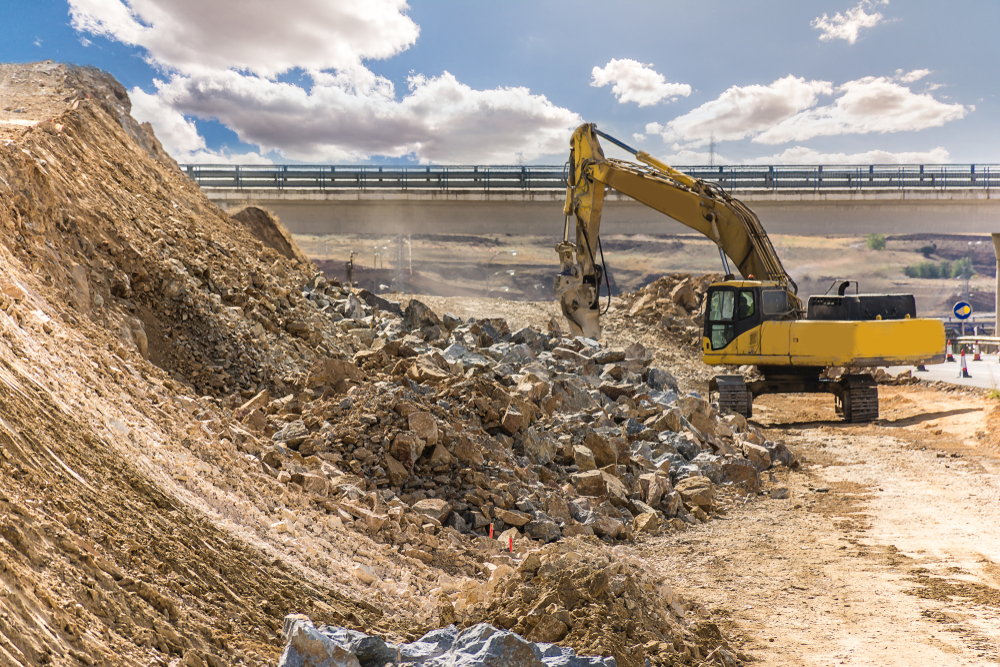
When a bridge or highway is constructed, there are times when existing materials need to be removed before the concrete can be laid. If these materials are in the space where the bridge or highway will be located, then excavation is required to clear the area.
Each site needs to be evaluated based on the types of materials that need to be removed as well as the techniques that should be used for the excavation. There are three types of excavation that might be used based on the circumstances of the job site:
Type #1: Common Excavation
In most situations, common excavation can be used, which includes all types of excavation with the exception of rock or other classifications, such as all rippable materials or asphalt type pavement. Typically, this work involves removing the soil materials that fall within the contract limits. But, it might include existing pavement as required.
When a material is listed in the plans but doesn’t fall under that defined excavation categories, including concrete pavement, then it is still often called common excavation. During this step of embankment construction, the plans usually include excavation, hauling, disposal, and compaction of the materials. As a result, it is usually necessary to have a soil sample and testing completed to determine the right moistures and compaction requirements before placing the concrete.
There are two conditions that impact the size and number of samples that are required:
- How many soil types are included in the work contract? It is necessary to evaluate every borrow pit and cut, and then submit samples of every different soil type that is encountered.
- What method will be used to remove and place the soil? If the contractor will be working each type of soil separately, then the samples need to be done separately. On the other hand, blended soils can be sampled together to match the plan for the site. This blending can happen during the placing or excavation.
When only a few samples are used, then a 5-inch auger can be sufficient to obtain the samples. It might be necessary to use a three-foot extension section of pipe so that the desired depth can be reached. If samples are needed at a depth of more than 5 feet, then the grading contractor will need to supply an operator and backhoe to obtain the necessary samples.
Information needs to be recorded about where the samples should be taken to go with the submission of the samples. In most situations, the samples need to be at least 25 lbs, or up to 65 lbs or granular materials. Then, a small portion of each sample is saved in case it is needed for reference in the future.
Specific information needs to be submitted to the District laboratory as requested, such as the centerline station, elevation, field office number, intended use, copies of special provision sheets, and descriptions of the soil (color, texture, moisture content, and visual classification). Then, the laboratory uses the samples to determine the optimum moisture content and the maximum density.
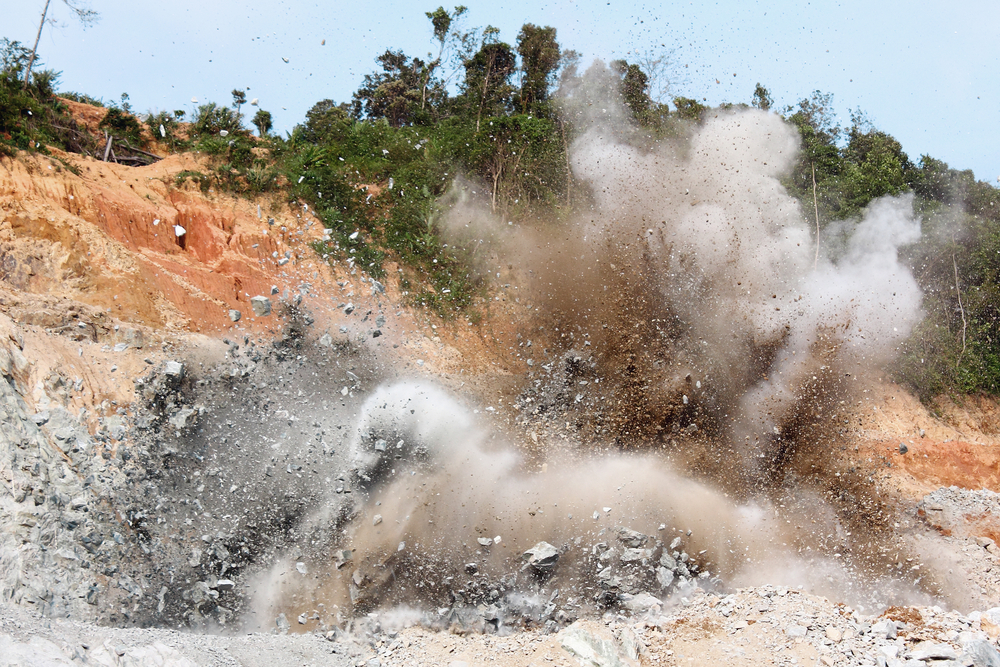
Type #2: Rock Excavation
When a site is classified as rock excavation, it means that the area consists of sedimentary, metamorphic, and igneous rocks that need to be removed. These materials could be in the form of solid rock, boulders, or detached stones with a volume of at least 1/2 yd3 or more.
These materials are removed by a power shovel with a bucket, blasting, or by using any other power equipment that offers equivalent results. Specific criteria need to be used when these materials are excavated:
- Exploratory Drilling: This step is used to determine whether there are potential sinkholes or cavities in the sections that are cut. The best practice is to drill the holes on the centerline with 100 ft intervals between. The holes are usually 7 feet below the proposed grade and 1 ½ inches in diameter. If a sinkhole or cavity is found, then extra holes need to be drilled at 25 feet increments.
- Pre-Splitting: It can be helpful to use rock pre-splitting techniques with explosives or drilling. The goal is to manage the breakage within the neat lines that are chosen in the cross-section. Usually, the holes for this step are between 2 and 4 inches in diameter, drilled 2 feet below the grade, and spaced 3 feet apart. The pre-split face should be no more than 1 foot from the back line of holes and 6 inches from the front line. The line holes should be fired before the blasting of the main excavation. This step is typically included in the cost of excavation, which means that there is no direct payment for the work.
- Explosives: The type of material on the site will determine the method and type of explosives that will be used. Solid dynamite columns or one strand of detonating chord can be used. The type of explosives needs to be capable of pre-splitting the material while maintaining requirements for minimum breakage outside of the area of excavation.
- Primary Blasting: When holes are drilled for the primary blasting, they are placed at least 6 feet away from the face of the pre-split. When extra charges are required, they are placed to be half the distance of the full depth holes, which are drilled to a depth of 2 feet above the pre-split face.
- Restrictions: The amount of explosives should be restricted when the site is near rock formations, structures, or other areas that might be damaged. During the blasting operations, it is important to take adequate seismograph readings to determine the way the explosions impact nearby buildings. These buildings should always be inspected for existing conditions before the work commences on the site.
- Finished Grade: The final step is to break the rocks in a way that is close to the slope lines on the plans. The goal is to leave the slopes reasonably uniform and smooth, and all overhanging and loose rock needs to be removed. In most situations, the rock cannot project more than 1 foot beyond the slopes that have been established. When a natural seam intersects the slope, then permission might be granted to follow the face of the seam for a specific distance. In the situation where the rock is excavated lower than the required elevation, then backfill is needed to meet subgrade elevation specifications. This backfill typically includes spalls, crushed stone, subbase material, or other material.
Type #3: Unclassified Excavation
There are times when the excavation doesn’t fall under the common excavation or rock excavation categories. Any type of material that is encountered during the work needs to be excavated and disposed of properly.
Here are a few examples of unclassified excavations:
- Waterway Excavation
- Class Y Excavation
- Class X Excavation
- Wet Excavation
- Dry Excavation
- Foundation Excavation, Unclassified
The techniques and best practices for these excavations can change depending on the types of materials, the conditions of the site, and other variables.
Disposing of the Excavated Materials
During the excavation, the materials need to be disposed of. First, it is necessary to classify the types of materials:
- Suitable Material: Can be used for fill in other places, such as shoulders or embankments.
- Unsuitable Material: Can’t be used for embankment, so it needs to be removed from the site.
- Excess Material: When the materials can’t be used constructively on the job site, then the materials can be disposed of or used to flatten fill slopes or widen embankments.
Borrow for Grading Completion
The contractor can obtain material from places outside of the right-of-way, known as borrow. These materials are used for the planned section of grading. The most common method is to obtain the materials from a property that is near the work site. When the materials are “borrowed” from a specific location, then it often creates small lakes or ponds. This formation is why the technique was given the name “borrow pit.”
Borrow materials cannot come from locations with high organic content. These materials need to be free of these substances:
- Form rotting (putrefying) deposits
- Form harmful (deleterious) deposits
- Toxic concentrations, or combinations that might be harmful to human, plant, animal, or aquatic life
When the growth of vegetation is needed, the borrow materials should not include:
- Recycled materials, including granulated slag, recycled foundry slag, or coal combustion products.
- Dune Sand
- B-Borrow
- Other granular material
The borrow pit needs to be prepared based on limits that are in place for the planned excavation, location, and drainage control for the area. These plans need to be approved by all parties involved before the contractor can proceed with the clearing.
Peat Excavation
When partially decayed plant matter is present in marshes and swamps, it is known as peat. The color of peat varies depending on the moisture content and compaction and might range from a light yellow-brown color to darker layers of brown. It is important to discuss peat because these materials are unstable and prone to settlement, which means that they are not suitable for roadway foundations.
Peat can be managed in several ways:
- Treatment of Existing Fills: Changes a fill over an existing peat deposit, which may include the width or height. This step is usually predetermined and outlined in the contract details, and it can be done by several means.
- Treatment by Removal: If this method is chosen, then the peat is removed from the site using machine operations. This step is usually recommended if the peat deposit has a small size, it is shallow in depth, or the deposit limits fall within the right-of-way or construction limits.
- Treatment by Displacement: The most common procedure that is used. This option can be useful when the peat deposit is deeper than 10 feet, the deposit is large in size, water is always present, and there is a high free water level.
After the peat has been excavated, either by displacement or removal, then it can be disposed uniformly between swamp ditch lines and fill slopes and beyond. Or, other methods might be used when disposal sites are available.
View the complete article here.
What are the different types of excavation, and how are they categorized?
Excavation is classified into Common Excavation (removing soil materials within contract limits), Rock Excavation (dealing with sedimentary, metamorphic, or igneous rocks), and Unclassified Excavation (for materials not falling under common or rock categories).
How is rock excavation performed, and what steps are involved in managing rock materials?
Rock excavation involves methods like exploratory drilling, pre-splitting, using explosives, primary blasting, and achieving a finished grade; techniques vary based on the type of material, and precautions are taken to avoid damage to nearby structures during blasting operations.


