


View the complete article here
One building material is so prevalent we rarely even think about it. Concrete – strong, stable, dependable. Recently, America got a grim reminder of the importance of concrete – when the Champlain Towers South condo in Surfside, Florida collapsed. Dozens of residents were killed. The cause will be investigated. But warning signs were there – in the concrete. In this article we discuss how to properly mix and pour concrete.
Concrete and Cement
Let’s first clarify that concrete and cement are not interchangeable terms. Cement is part of the concrete mixture. The most widely-used cement is portland cement. Portland cement is manufactured from mined materials such as shale, iron ore, clay, and limestone. It is heated to a very high temperature in a cement kiln. This produces a ball called a “clinker.” The clinker is ground down. Mixed with water, it becomes a paste – one of the essential ingredients in concrete.
The Mix Matters
How and what you mix matters. Whether it’s a pool, sidewalk, foundation, or building, people are depending on you to do it right. In general, standard concrete is comprised of 60-75% coarse and fine aggregates and 10-15% of cementitious materials. The remaining 15-20% of the mixture is water.
Aggregates
There are several types of aggregates that may be used in a cement mixture, including:
Crushed Stone
Rock is mined then crushed to a specified size. Crushed stone may be sedimentary, metamorphic, or igneous. Commonly used construction aggregates include sandstone, quartzite, slate, marble, and volcanic cinder.
Manufactured Sand
Manufactured sand is simply rock ground to the desired fine texture.
Gravel
Gravel is a deposit naturally formed through weathering and erosion.
Sand
Naturally occurring sand is comprised of fine rock and mineral particles.
Recycled Concrete
Sources of existing concrete from roads and buildings are broken up, removed, and crushed to a specified size. It is often used as a base layer since it compacts well and forms a firm surface.
Cementitious Material
What would normally end up in a landfill is used to make cement easier to work with when wet or improve performance once poured and cured. The most common cementitious material is portland cement. Other cementitious materials used include fly ash, silica fume, and ground granulated blast furnace slag (GGBFS).
Fly Ash
Fly ash is the molten mineral residue that is a byproduct of burning coal to generate power. Fly ash increases the concrete’s durability. It is often used in portland cement.
Silica Fume
Silica fume is a very fine powder used to greatly strengthen concrete. It also reduces the cement’s water permeability. It is a byproduct of silicon metal or ferrosilicon alloys production.
GGBFS
Ground granulated blast furnace slag (GGBFS) is a byproduct of iron in a blast surface. It strengthens cement – particularly when mixed with portland cement.
Water
The type and purity of the water used in the mix affects the properties of the mixture during the pour and the quality of the concrete after it cures. Generally potable water is used. However, non-potable, such as wells, streams, and storm water may also be used. Another water source is runoff from cleaning equipment on the site. This is called “process” water. Non-potable water may require testing to maintain compliance with environmental regulations. However, it should be tested anyway since PH levels and solids content can impact the cement’s performance. It may be necessary to treat non-potable water before mixing to remove impurities such as oils and dissolved salts.

Concrete Mixing Methods
There are three methods for mixing concrete – by hand, by machine onsite, or by machine offsite (called ready mix).
Hand Mixing
Mixing concrete by hand is typically reserved for small do-it-yourself (DIY) home projects. In part because of the labor required. But it’s also very difficult to produce the quality and consistency required for large construction projects.
Steps for Hand Mixing Concrete
Determine the amount of concrete mix needed. Quikrete has a handy calculator.
Gather your tools:
- Mortar tub or wheelbarrow
- Shovel or hoe
- Measuring cup for water (About 80 pounds of concrete mix will need approximately 3 quarts of water)
- Gloves and safety goggles
- N95 mask

- Put on your gloves and goggles. You do not want the dust from the mixture to get in your eyes.
- This is a good time to wear an N95 mask to keep from breathing in the dust.
- Place the bag of concrete mix in the tub or wheelbarrow.
- Cut the bag in the center, flip it over, and pour the contents into the vessel.
- Use the hoe or shovel to form a well in the middle.
- Add about 2/3 of the water.
- Mix the water and concrete mixture in a back and forth motion until fully incorporated.
- Test the mixture using the “slump” test.
- When the mixture is ready, place any tools that came in contact with the concrete in water. You’ll come back later to properly clean them.
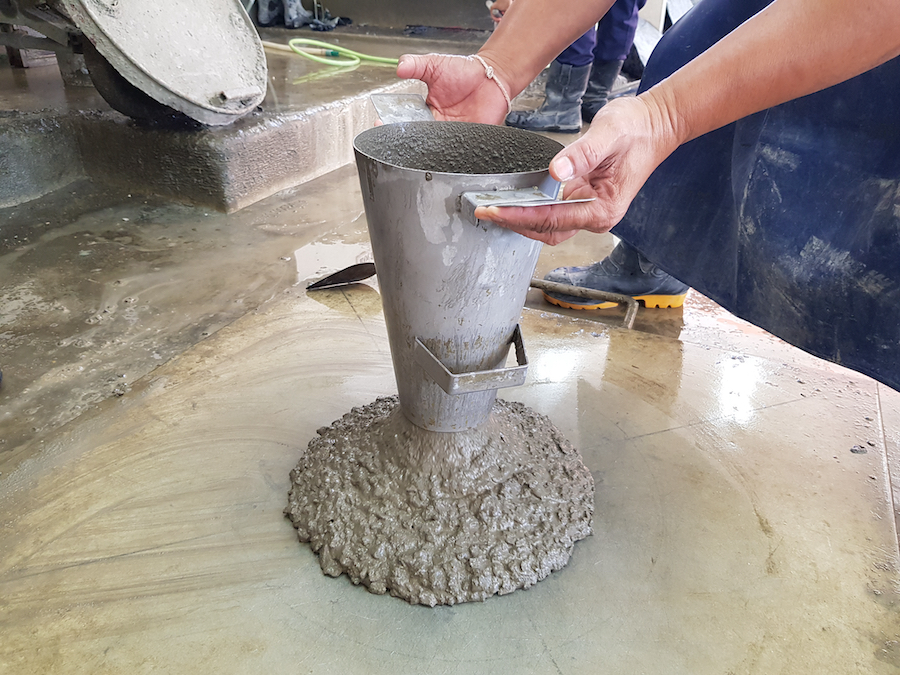
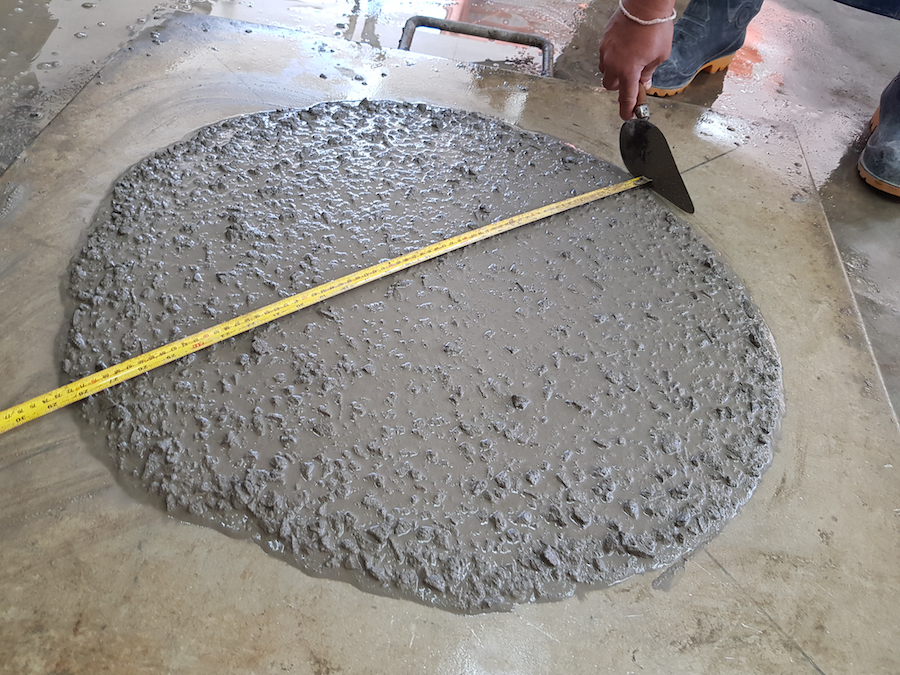
The Slump Test
Cut the bottom of a paper or plastic cup. Shape into a cone. Fill the cone with your mixture. Carefully dump it out onto a flat surface. (Kind of like building a sandcastle.) The mixture should fall (slump) down about half the original height. No slumping indicates too little water. Slumping more than halfway means there is too much water. Remember, you can add water, but you can’t take it away. You’ll either need to add some more mixture or add more water. In either case, do the additions in small increments.
Machine Mixing
A portable drum mixer or large stationary mixer are brought on the jobsite. This is known as a “portable plant.” Machine mixing is also used offsite in ready mix plants.
Steps for Machine Mixing Concrete
- Place the concrete mixer in the locked, upright position.
- Don your cool gloves, safety goggles, and N95 mask.
- Add the water to the mixer.
- Slowly add the dry mix into the mixer. Slow-pouring reduces the amount of dust.
- Turn the mixer on and let it run for several minutes. You want to ensure that the concrete is well-mixed.
- Test the consistency of the mixture using the slump test.
- Pour the mixture into the wheelbarrow or mortar tub.
- Prepare to wash out the mixing machine soon after you empty it. Like, before it hardens.
Ready Mix
Ready mix can be supplied wet or dry to the jobsite. The concrete is produced by a ready mix plant and delivered either freshly mixed or prepared for mixing. Ready mix is a great solution for smaller jobsites that can’t readily accommodate a portable plant. If you have the ready mix delivered dry, you will use the same steps for machine mixing.
Bad Mix Signs
The first signal that it’s a bad mix is it fails the slump test. A mixture that is too dry or too soupy results in weak cement. The time to ensure it’s the right consistency is before you pour. Sounds obvious, but there can be pressure to just pour it and get the job done. Remember your company’s reputation and the safety of others. Even a poorly completed DIY project can end in disaster. Someone getting hurt on your property can result in a lawsuit.
Pouring Methods
There are several ways to pour concrete including:
Buggying
You can transport up to approximately a yard of concrete with a motorized buggy. It would take about 16 wheelbarrows to move the same amount.
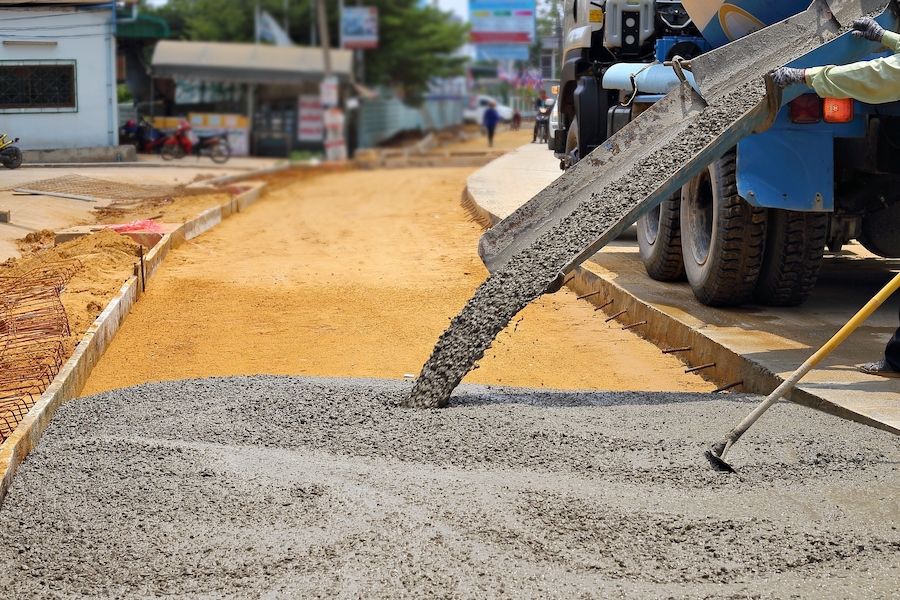
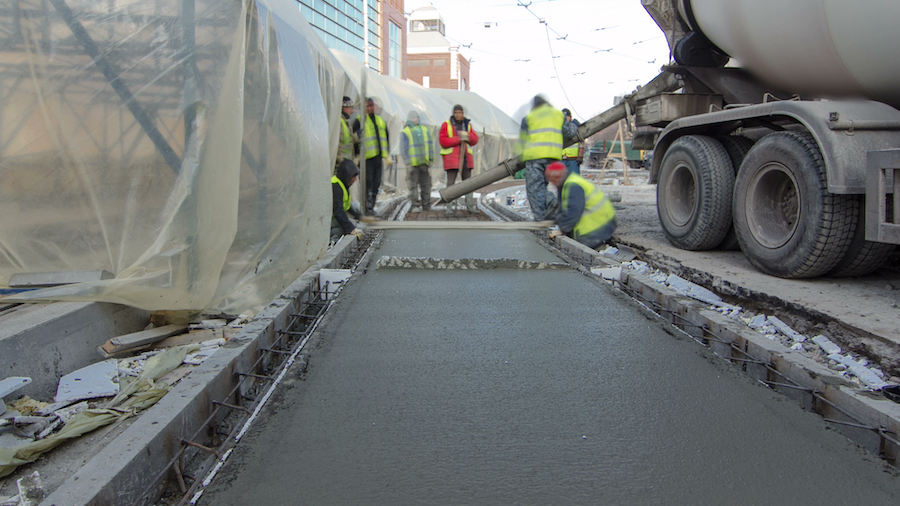
Tailgating or Chuting
Tailgating, also called a chuting, is pouring concrete down a chute attached to the mixing truck. There needs to be enough room on the site to get the chute close to the forms. The truck also needs room to maneuver. Multiple chutes can be attached together to extend the reach.
Line Pumps
Line pumps are typically used for smaller, residential concrete jobs. Concrete is poured from the truck into the line pump. The concrete then flows through a hose into the form. Because the hose is narrow, a special mix is needed.
Boom Pumps
Boom pumps are for large commercial projects. The mixing truck pours cement into the pump. Instead of a hose, the delivery system is a boom that can be as long as 200 feet.
General Pouring Tips
Small Sections
Pouring the concrete in small sections gives you far more control and minimizes mistakes.
Initial Leveling
Your first pass at leveling the freshly poured concrete may require multiple passes using a screed. The screed is typically just a straight 2×4 foot board that you drag across the top of the concrete. Your helper can remove or add concrete in front of the screed as you’re pulling it.
Screed Tips
Pull the screed board back and forth. This reduces voids in the concrete. Your helper will pull excess cement back to fill in the low spots. It’s a delicate balance – enough concrete to fill in voids, but not so much fill as to prevent the screed board from moving. Slow and steady is best. It sounds counterproductive but a slight bow in the screed board is actually helpful. The small hump in the concrete it creates helps drain water away. This bow is called a “crown” and should face up. (Otherwise you create a valley that will fill with water.)
Bull Float to Smooth the Surface
A bull float tool looks like a flat mop with a long handle. You’ll want to bull float soon after screeding to ensure the cement is wet enough to shape. Bull floating smooths out marks that often are created through screeding. You will also use the bull float to push larger pieces of aggregate down below the surface of the concrete.
Bull-Float Tips
Keep the passes to a minimum – three to four is sufficient. Overdo it and you’ll draw up water and cement that can weaken the final product. To avoid spalling, push the chunks of gravel down with small stabbing motions as you return the bull float to its starting position.
Round the Edges
Start edging when the concrete is firm and after any surface water has dissipated. You’ll use an edging tool to round the edges. The final edge should be smooth. Use longer strokes to keep the lines straight.
Hand Float
The edger will leave ridges that you’ll need to remove with a hand float. It’s your last opportunity to cover any dry areas or voids near the edge with some material or moisture.
Grooving
You’ll now purposely create a weak spot in the concrete with grooving. When the concrete inevitably shrinks it will crack along the groove rather than the other sections you worked so hard to smooth out. It keeps the integrity of the cement and it look more attractive since the grooves tend to hide the cracks.
Broom Finish
Creating surface ridges with a broom provides the concrete with a nonslip surface when the concrete gets wet. You want to create traction, but not a surface that is so rough it hurts bare feet. If there is a slope in the concrete, move the brush perpendicular to it. If there is a drain, make sure the broom marks run toward it. The concrete must be dry enough to create the marks. The ridges should run evenly from edge to edge.
Curing Time
Surround the area with caution tape or temporary plastic fencing to keep people and pets away while the cement cures. Generally you can walk on the concrete in 24 hours. However, it will take about a week and half or more before it is cured enough to drive on. Clients should be made aware that chemicals, such as those used for ice melting, should not be used for two years. This will weaken the cement.
Wet the Cement
In order for the cement to cure slowly you need to keep it moist. You want to give the cement time to develop strength. Another option is to spray the area with a curing compound.

Bad Pour Signs
There are several indications that the pour did not go well. They include:
Bleeding
Bleeding water leaches up to the top while the weightier deposits settle underneath. That’s why you want to keep water — groundwater or rainwater — from coming into contact with freshly-poured concrete.
Honeycombing
Air pockets and voids in the concrete result in honeycombing. These are empty spaces deep down inside the set concrete. It can appear as rough surfaces on the exterior of the concrete. It is due to not properly tamping down the freshly poured concrete. An inadequate amount of aggregate can also cause honeycombing.
Cracking
Natural disasters like an earthquake can cause cracking. But it’s usually due to a bad mix and / or poor inner support. Hairline cracks are enough to cause concern and should be addressed immediately.
Delamination
You may not see it, but you can hear it. Delamination means that pieces of concrete appear to still be attached but are separated from the other layers. Test for delamination by tapping on the concrete. If there is space behind the concrete, the sound you hear will be a hollow echo. Delamination may be caused by embedded supports failing or damage inside the concrete. Pouring new concrete over damaged concrete can result in delamination if the new layer is not adhered to the old layers properly.
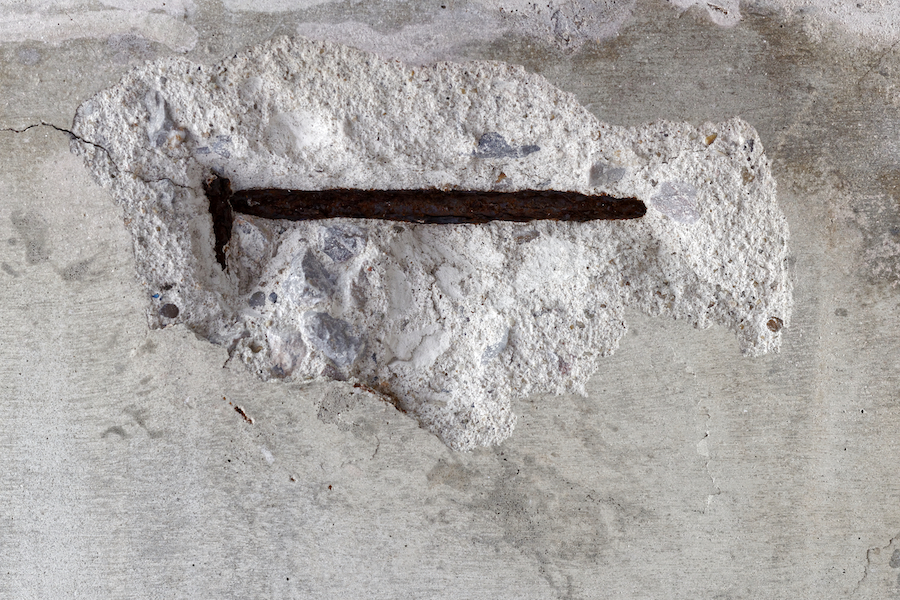
Spalling
Spalling follows delamination. The separated layer separates completely from the structure, revealing the interior support. You may actually see wires and beams. One cause is the freeze-thaw cycle that occurs over many winters. The best way to mitigate spalling is to keep water away from the concrete as it cures.
Conclusion
Properly mixing and pouring concrete can sometimes mean the difference between life and death. Make sure you are using the right mix for the job and that you use enough, but not too much, water to keep the cement as strong as possible. The water you use can impact the durability of the concrete. Potable water is best. Pouring in small sections, and finishing the concrete through careful screeding, floating, finishing, and curing will result in an attractive and safe final product.
View the complete article here

What are the essential components of a concrete mix?
A standard concrete mix consists of 60-75% coarse and fine aggregates, 10-15% cementitious materials (such as portland cement, fly ash, silica fume), and 15-20% water.
What are the key methods for pouring concrete, and how can I ensure a successful pour?
Concrete can be poured using methods like buggying, tailgating, line pumps, and boom pumps; success depends on factors like proper mixing, small section pouring, meticulous leveling, finishing techniques, and appropriate curing to prevent issues like bleeding, honeycombing, cracking, delamination, and spalling.


